


This short guide to drawing in “Two-Point perspective” uses the exterior of a building as the subject. Obviously any product is going to use exactly the same principles but using an urban ‘scene’ allows other objects within an environment to be included and seen to relate to the initial focus - in this case the building.

Engineering Drawing and Sketching
for GCSE
for GCSE
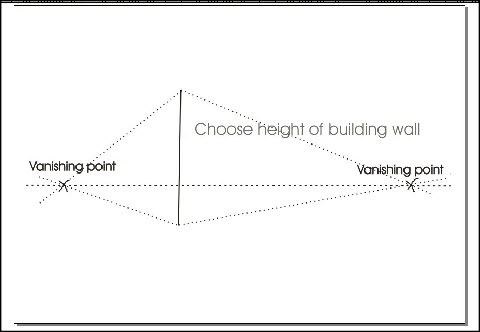
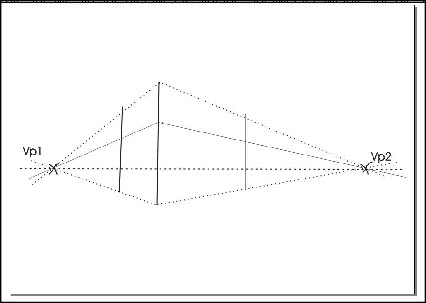
Three basic rules allow 2-point sketches to be done: 1) All vertical lines are drawn with the set-square on the horizontal motion bar ( the parallel motion bar)
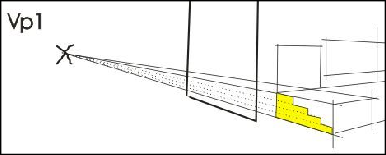
2) All lines that are in a horizontal plane in the drwaing go either through VP1 or VP2 ( VP = “Vanishing Point” )
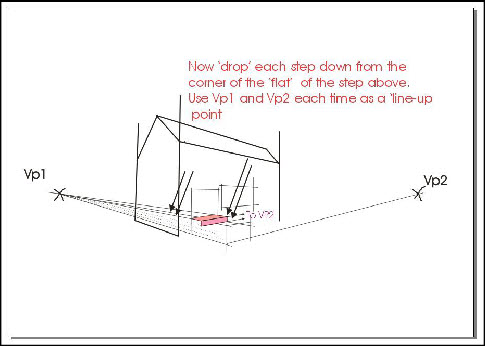
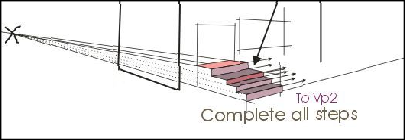
More complicated parts like the steps shown here are easy to approach if they are taken slowly and if each surface is added making sure that VP1, VP2 and vertical lines are used whenever a horizontal or vertical plane is needed. Angled planes can always be drawn if vertical reference planes are drawn in first.
Two-Point Perspective sketching