


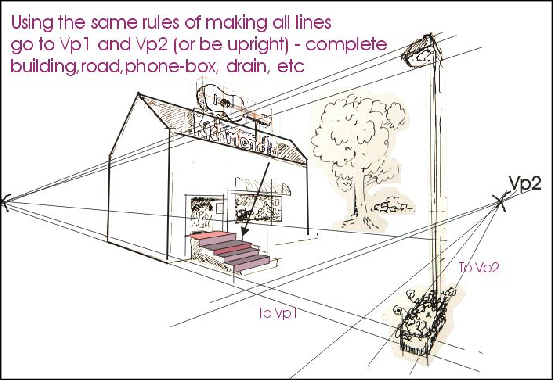
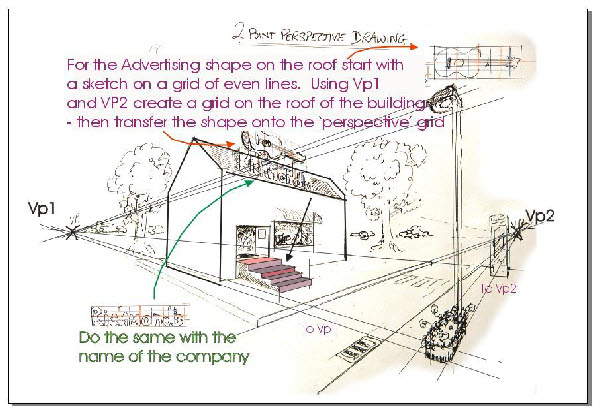
Follow the instructions for creating the shapes that don’t follow the rules needed for ‘square-based’ shapes. Using a grid drawn in perspective it is quite easy to transfer shapes onto it by noting where particular features cross the reference (straight) grid.
It is at this stage that drawings with very close vanishing points become quite distorted. In just the same way that a very wide angle lens on a camera gives distorted shapes in the foreground so too does the close positioning of VP1 and VP2.
Drawings tend to be more realistic if the vanishing points are as far apart as possible.
Drawings tend to be more realistic if the vanishing points are as far apart as possible.

Engineering Drawing and Sketching
for GCSE
for GCSE
Two-Point Perspective sketching ... continued


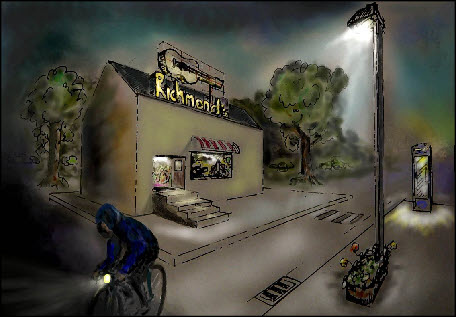

Using Photoshop or Coreldraw it should then be possible to add colour and mood to your sketches. Whether it is a new design for a vacuum cleaner or a building it should be possible to make your sketches live
a little.
a little.