~ Design & Technology ~ 

Modifications

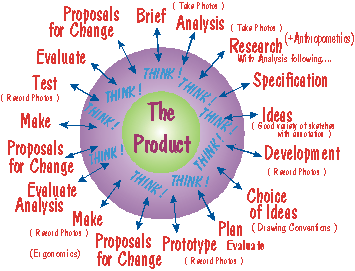
Everyone can improve their final product - Even BMW, Audi, IBM or whoever.  Every product doesn't suit everyone for one thing - and this of course is why you probably spent some time checking out the topics of
anthropometrics and ergonomics AS well as these considerations though once a product is made it becomes obvious that some things have been overlooked.  Sometimes this can happen because something - usually a design feature - has been added on.  This can then make a feature that had originally been designed into the item impossible to operate.
             
Our prototype buggy was quite wide.  The circuit board was used as a chassis and a vacuum formed top added to make the product look good.  However the variable resistor had been soldered in place along with all the other components on the non-track side of the board.  This now meant that once the vacuum formed top was screwed into place the variable resistor couldn't be adjusted without taking the top off again.

A simple solution was obviously to drill an access hole to the adjustment screw of the variable resistor.  This could be 3mm and centred on the position of the component on the PCB - alternatively we could unsolder the variable resistor and re-attach it from the track side of the board (which is beneath the buggy).  Now no problem in adjusting the buggy to sit quietly on the start line until the flash to set it off occurred.

Problem solved !

1

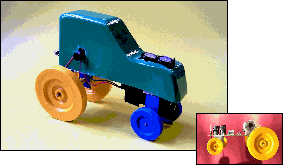
Another refinement was included as the width of the PCB board / chassis was reduced. 
The reduction meant less material was being used ( and therefore as a toy-company owners, the sooner our private jet or Ferrari would be delivered - since  more profits would be made !).  We could argue that the finished product was now more aerodynamic as it had a much smaller profile presented to the air as it raced away from the start line - but maybe we should just own up and admit it saved materials !  Of course this had the knock-on effect that less material as also use in making the vacuum formed top.

As a project all students had the same size and design of vacuum formed top - arguably to make the competition fairer - but again honestly - this made the project more compact from a teaching point-of-view.  Anyone wanting to create their own design could do that in their own time anyway.

Problem solved !

2

Some changes were also made to the pattern for the vacuum formed top.  As the prototype shape and PCB layout has become more settled the wooden pattern is becoming more standardised.  A space /hole for high-standing tops of the capacitors previously had to be drilled and then smoothed.  The pattern has now been adapted with a slight rise being included to accommodate the capacitors - equally this rise could more easily be trimmed away if the capacitors were felt to look better when exposed.  Many students wanted to leave the top off their buggy too - as it looked more complex - in the way that many F1 and Dragster cars appear during racing.

The drive pulley on the motor's shaft also could either protrude or be contained within the vacuum formed top according to the addition or removal of an extra pattern-section on the side.

Problem solved !

3

Now write up your own  A3 sheet reviewing your own modifications.  If your task has been to complete the buggy maybe you can share your re-designs with everyone else through this site.

If you haven't already
visited the 'Design-Cycle' section of the site - Check it out from here

Take Photos !

You are Visitor No: