

IF IN DOUBT ASK !
~ Thick & Thin Lines ~


Check out the DESIGN-CYCLE section
Why donate

THICK and THIN lines
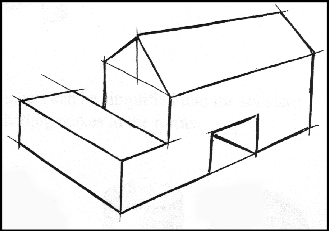
Lines making up simple sketches are often shown all of the same thickness but for your GRAPHICS and other D&T coursework you should ‘show-you-know’ this method.
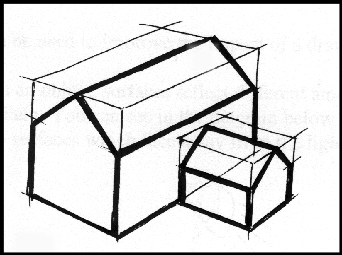
Start by drawing any simple shape. Use the ‘crating’ or ‘box’ technique you have learned and used before.
Lines making up simple sketches are often shown all of the same thickness but for your GRAPHICS and other D&T coursework you should ‘show-
Start by drawing any simple shape. Use the ‘crating’ or ‘box’ technique you have learned and used before.

Next ...think about each of the lines in turn .... if this were a real object in
front of you, would you be able to put your hand ‘behind’ the line you are thinking about ?
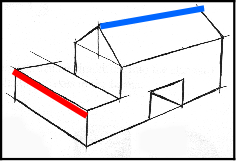
For instance the line that shows the top of the roof (marked in blue) in the sketch above and to the right, helps represent a surface that would stop you from seeing your hand if it were passed behind it. However the line that helps represent the front of the ‘flat roof’ part of the building (shown in red) wouldn’t let you put a hand behind that surface.
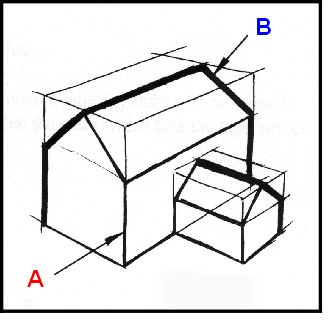
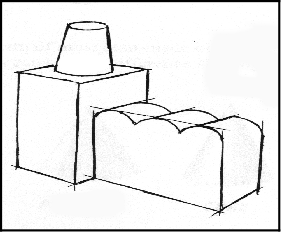
On the lower drawing you can see the two different types of line.. A and B ... Use THICK lines for those where your hand would be hidden and THIN lines for those where you couldn’t get your hand behind the line.
On the lower drawing you can see the two different types of line.. A and B ... Use THICK lines for those where your hand would be hidden and THIN lines for those where you couldn’t get your hand behind the line.

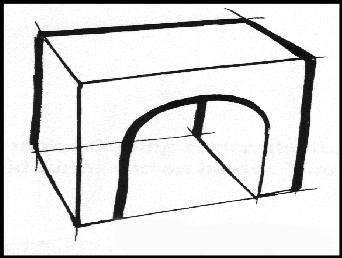
Now try and complete drawings like the ones shown below… Use THICK and THIN lines as described in the text boxes above.